1. Download the code
Go to GitLab - OpenTPS
git clone https://gitlab.com/openmcsquare/opentps.git
Don’t hesitate to register as OpenTPS user and tell us more about your project by clicking here
2. Install OpenTPS libraries on your computer
To set up OpenTPS on your computer, you have three options (and you only need to choose one of these).
2.1 Use PyPI (Not recommended for developer purpose)
-
Install the latest version of Anaconda. Download the latest version from https://www.anaconda.com/.
- In a conda prompt, create a new virtual environment with python 3.9 and activate it:
conda create --name OpenTPS python=3.9 conda activate OpenTPS - Install OpenTPS:
pip install opentps - start it with:
opentps
Always ensure that you have the “OpenTPS” environment activated before launching the software
2.2. Use .bat or .sh files (recommended for developer purpose)
/!\ Only available on windows and linux
2.2.1 On Windows :
After cloning the git repository, you will find two .bat files in the main directory: (install_opentps_windows.bat and start_opentps_windows.bat).
To begin, open a command prompt and navigate to the main directory. Run first :
.\install_opentps_windows.bat
Which will create a new Python environment named “OpenTPS” and download all the necessary packages.
Once that is done, still in the same directory, execute
.\start_opentps_windows.bat
To launch the OpenTPS software
2.2.2 On Linux :
After cloning the git repository, you will find two .sh files in the main directory: (install_opentps_linux.sh and start_opentps_linux.sh).
To begin, open a command prompt and navigate to the main directory. Run first :
bash install_opentps_linux.sh
Which will create a new Python environment named “OpenTPS” and download all the necessary packages.
Once that is done, still in the same directory, execute
bash start_opentps_linux.sh
To launch the OpenTPS software
2.3. Configure Python or your IDE
OpenTPS is split within a single package named opentps into two separate distribution packages: opentps_core and opentps_gui. To import modules from those subpackages as
from opentps.core import ...
from opentps.gui import ...
python or your IDE must be appropriately configured.
NB: We recommend using Visual Studio Code or PyCharm as IDEs, as we have experienced issues with others IDE (Spyder,…).
2.3.1. Using Anaconda
Tell conda to add opentps_core and opentps_gui to its site-packages directory list. This works by creating a conda.pth file in site-packages.
conda-develop path/to/opentps/opentps_core
conda-develop path/to/opentps/opentps_gui
If command conda-develop is not available. You might need to install conda-build first
conda install conda-build
NB: if the option “install for all users” has been selected at installation of anaconda, the conda-develop need admin privileges and after closing the prompt, the open_tps packages are “lost”. The only fix known is to re-install anaconda for only one user
2.3.2. Without Anaconda
a. On Linux
Tell Python to add opentps_core and opentps_gui to its sys.path directory list.
export PYTHONPATH="path/to/opentps/opentps_core:path/to/opentps/opentps_gui:$PYTHONPATH"
Note that you will need to use this command each time you launch a new terminal. To make this change permanent: add this line to your .bashrc file
b. On Windows:
Add new environment variable PYTHONPATH:
Windows11 :
- Open “Settings” -> “System”
- On the right side, at lower end, click on “About”.
- Then click on “Advanced systems settings”.
Previous version of Windows
- Got to the Windows menu, right-click on “Computer” and select “Properties”:
- From the computer properties dialog, select “Advanced system settings” on the left:
From the advanced system settings dialog, choose the “Environment variables” button:
In the Environment variables dialog, click the “New” button in the top half of the dialog, to make a new user variable:
Give the variable name as PYTHONPATH and the value is the path to the code directory (i.e. path/to/opentps/opentps_core and path/to/opentps/opentps_gui). Choose OK and OK again to save this variable.
c. Configure PyCharm
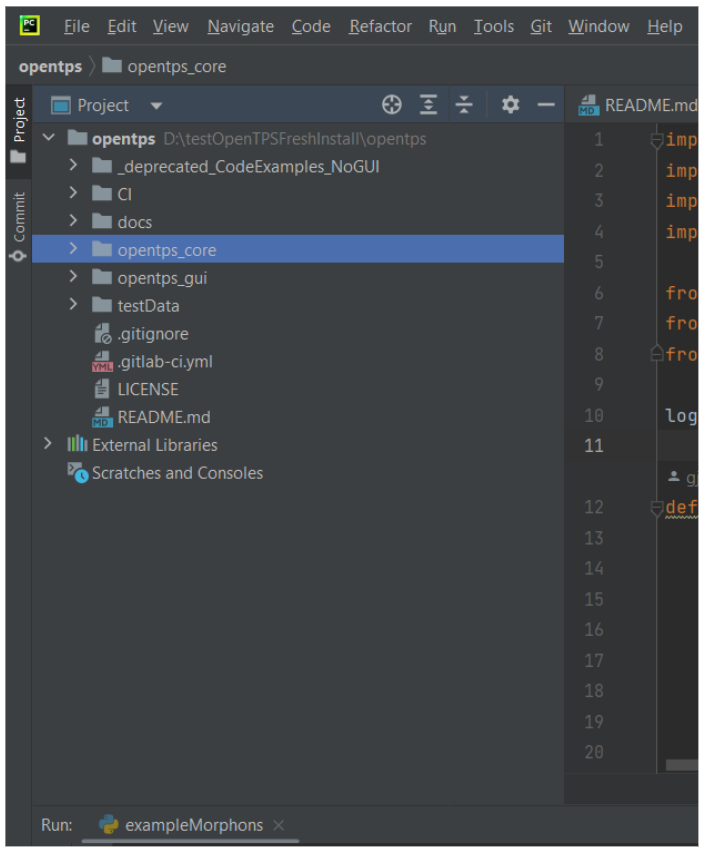
Once you have opened the cloned folder in pycharm you should have this on the project panel on the left.
If you did not configure your Python to add the core and gui package (See Configure Python section above), the opentps_core and opentps_gui folder will not be considered as packages. You have to add them as content roots such as Pycharm has access to both folders as if they were individual projects (which they kind of are).
In File > Settings > Project > Project Structure, remove the current content root on the right panel.
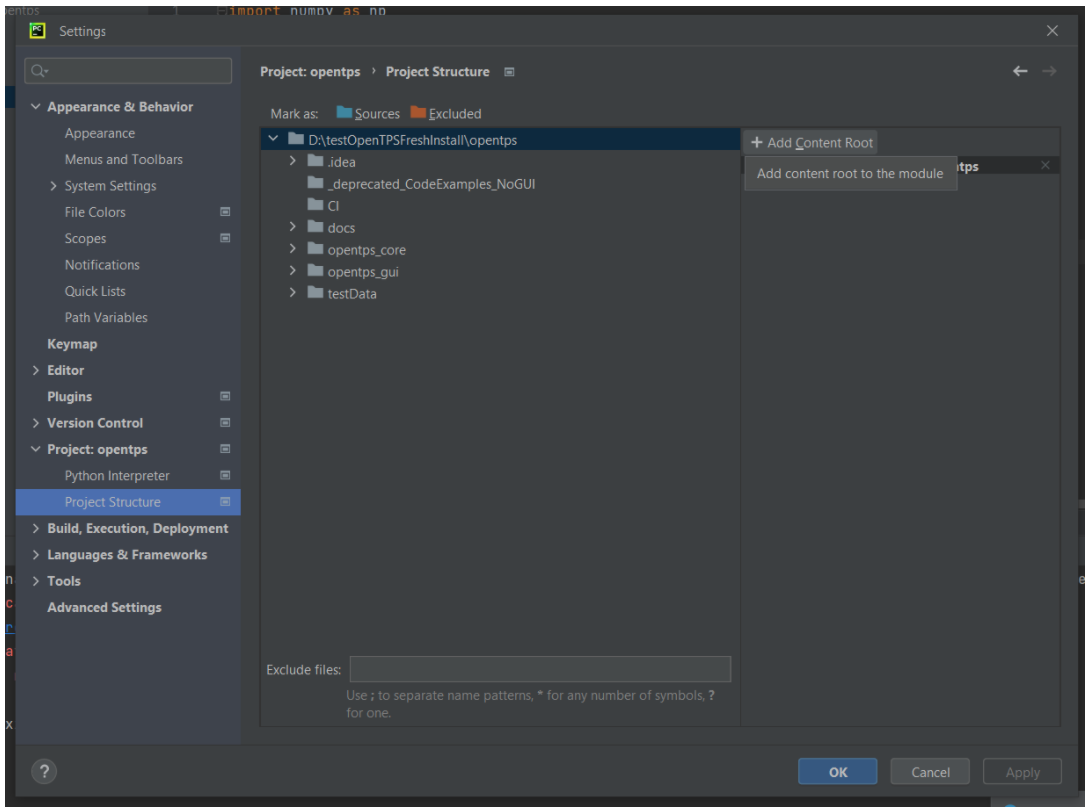
And add the opentps_core and opentps_gui folders as content root
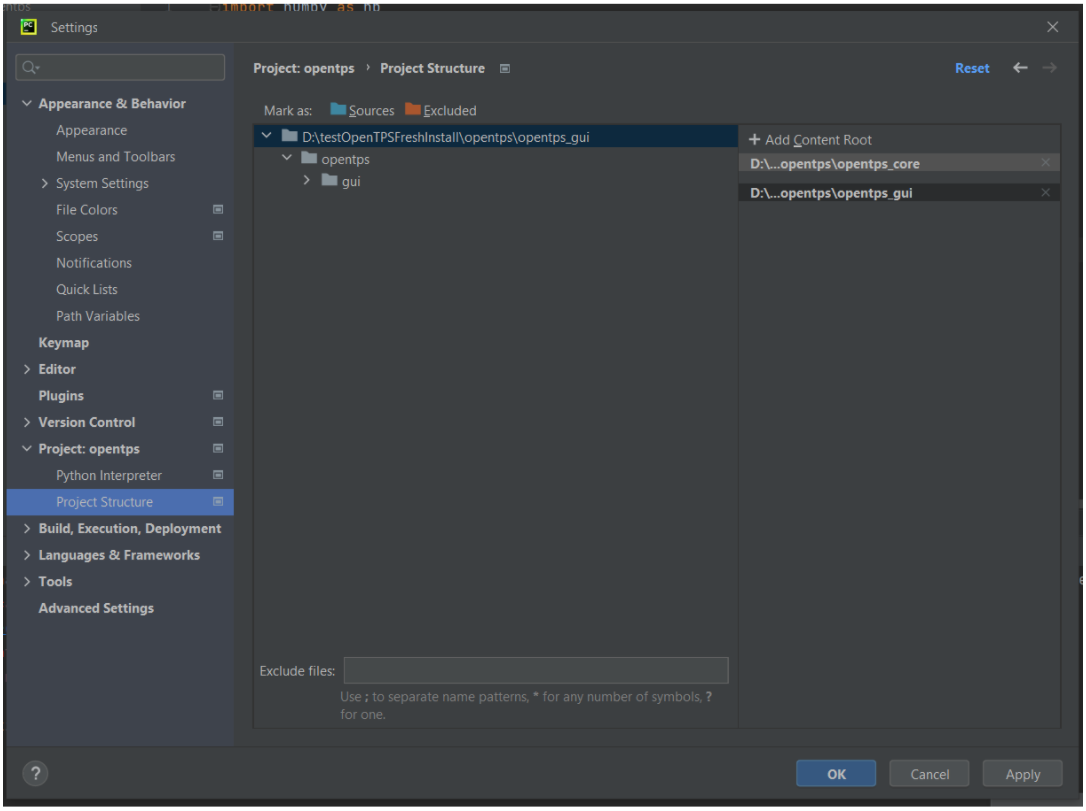
Examples from the opentps_core > opentps > core > examples folder should now run, as well as the main.py file in opentps_gui > opentps > gui to launch the GUI.
NB: Tutorial made using pycharm 2022.2.1 community edition
d. Configure VS Code
When using VS Code with anaconda (for information on how to set up anaconda with VS code, see here), following the python with anaconda configuration should set up VS Code properly.
If this does not work or you are not using Anaconda, follow the guidelines from VS code website on multi-root workspaces to add opentps_core and opentps_gui to content root.
2.3.3. Launch the GUI
The gui may be launched by executing opentps_core/opentps/gui/main.pyor via a script with:
import opentps.gui as opentps_gui
opentps_gui.run()
Note that the GUI will block the main thread.